|
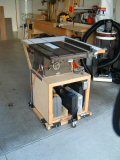
I installed this fence on a Craftsman model 101.2237. The saw is about 60 years old, I am not the original owner. I found it on the Recycler. The saw has served me very well, however fence technology has improved somewhat since the 40's I thought it was time to upgrade. I had already added a couple of extensions to the table, this helped the install along, in the end I only needed to make one additional extension. This was the most time consuming part of the installation. * You might notice the strap for my camera in this picture, and others. I have yet to master basic photography skills. I think I will stick to woodworking! |
 Click picture for larger image |
|
I made my decision to purchase
while attending a local woodworking
show. Before the show I was researching a Biesemeyer
fence. My apprehension over the fit on my saw kept me from buying one.
At the show I
ran across this HTC
fence. Because the show was
a local I was able to go home and double check the potential
fit for my saw. Sure of the fit I went back the next day and
picked the fence up. I paid $276 tax included for the fence, rails
and a spare set of clips. If you buy one make sure you get the rails
with the fence, they are sometimes sold separately.
|
|
|
I purchased the 800 series
contractor fence to the best of my knowledge is identical in
construction to the 900 series, but it is slightly shorter and not as
wide. I have not
found detailed specs on both fences for comparison. I took the system
home in two boxes one for the fence the other for the rails. The rail
box contained three components. Two angle iron brackets for mounting at
the front and rear of the saw and a
squared "tube". The fence rides on the "tube". The bracket for
the front of the saw had two "holes that
were over sized horizontally to a 1/2". This allows a little bit of
wiggle room for most saws. If the is not enough wiggle room for your
saw you will have to drill additional holes. The holes were 16" apart
from
each other on center. I had pre-measured my fit before purchase so it
simply bolted right on.
|
|
|
The tube that supports the fence mounts onto the the front angle iron bracket. The mounting is from the bottom, leaving a gap between the saw and the tube. The three point locking system for the fence uses this gap. Once you mount the front bracket and install the mounting tube, you are ready to use the fence. I give the fence high marks for ease of installation. |
|
|
The front bracket is supposed to mount 7/8" below the table top (9/16" for the 900 series). I could not quite meet this requirement on my saw. This resulted in the fence riding a little high at the rear. This was not a problem on my saw. The fence was perpendicular to the table, if it had been off for some reason the 7/8" would be more important. There are two nylon inserts on fence mounting for leveling(visible here). Using the inserts would have increased the gap between the fence and the top. Again, this was not an issue for me. |
|
|
The rear rail is not really
required the fence require it for operation. Its only function is to
support the wings on the saw. If your
saw already has well supported wings you would not need it. The picture
on the right shows the installation of the rear rail. I repositioned an
existing wing from the right side of the saw to the left. The rear
bracket
fit the same as the front. I removed the outfeed support wing and put
the bracket between the wing and saw. No modifications were required
for this fit.
|
|
|
Overall I give this fence high marks. It works reliably and accurately, it should be a huge improvement over the majority of stock fences. If you are considering this fence it is easy to install and performs well. One last feature is the micro adjustment. There is a small lever on the left side of the fence that can snug the fence. Once snug a dial on the right side of the fence allows you to make small adjustments without tapping the fence. This feature work well and I quickly came to rely on it. |